Pages

Showing posts with label sewing. Show all posts

Monday, May 7, 2012

Package Pals Craft Exchange

Over at C.R.A.F.T., Jamie hosted another great Package Pals exchange. This time around I got paired with Ami from AliLily. She is so fun and we have become great friends. Stop by her blog because she has great recipes, craft tutorials and you will LOVE the jewelry she makes!

Participating in Package Pals is a blast because not only do you get to make something crafty for someone else, but you get the surprise of an awesome package in the mail.


After getting to know Ami, I found out her favorite color was orange so I went with a totally orange themed package.

Sunday, March 25, 2012

The *Easy* Baby Blanket: Take 2

Spring is in the air around here and everyone I know is having babies. I have been a busy bee making all sorts of things for little ones. I think baby gifts are one of my most favorite gifts to make because they are so cute!

A couple of our best friends just recently had their first boy and I wanted to make them something bright and fun for him. I remembered The *Easy* Baby Blanket I had made awhile back and thought that something like it could be the perfect gift, so it was off to the craft room once again.


This time I decided to jazz it up a bit and make a 4 patch blanket. It is just as easy as the original and sews up so quickly!

Monday, March 5, 2012

DIY: Crochet Hook Clutch

At the end of January, a bunch of us signed up for C.R.A.F.T's Package Pal's Party. It's a fun way to make a new friend and exchange really awesome (crafty) goodies with them.

My package pal is Tres over at Tres Chic Nails. She also runs another great blog - The Inked Hooker. I was super excited when I found out that we were matched up because she can crochet! As I may have mentioned, I am totally incapable. She was super excited too because I can sew. We couldn't have been matched more perfectly! Her package to me is in transit and should arrive any day.

Since she is an avid crocheter, I knew just what to make her. I came across this lovely little Crochet Hook Clutch over at Little Birdie Secrets. They give a great tutorial on how to make it, but it does take some patience.


Tres mentioned that her favorite colors were red and black and while I was hitting up one of the local quilting stores, I fell in love with the gorgeous fabric


I picked a contrasting inside fabric for the hook pockets and made a small pocket for her needles. I used the measurements in the tutorial as guidelines for where to sew the hook pockets. I also sewed a bigger pocket that could be used for small scissors or a wider hook.


The whole package included the hook clutch, a hook sizing ruler and a cute California postcard.

I heard back from Tres recently and she just loves it, which makes me soooo happy!

If you get the chance to do the Package Pals, you definitely should. It's a ton of fun!

I will also be linking up at these parties this week.

Pin It

Monday, January 23, 2012

How to Resize a One-Shoulder Top

Have you ever ordered something online and when it arrived, it just didn't fit quite right? Well that's what just happened to my sis-in-law. It can be such a pain to return things too! This new shirt is so cute but it just needed a little help to make it fit. Sewing machine to the rescue!


The problem she was having with the shirt was that it was a little too wide on the sleeveless side, so it stuck out very awkwardly. The satiny material of the shirt can be kind of hard to work with but I found a way to help with that.

To make alterations some helpful tools to have are tailors chalk (or a washable fabric marker), sewing pins, a straight edge ruler (or other ruler), pinking shears and a cutting board. Oh and don't forget the sewing machine!

I had her try the shirt on inside out and then marked with the chalk where it should be taken in. Then laid the shirt out on the cutting board and traced that point down the entire seam. It ended up being about an inch that needed to be taken in.

After marking that point, I pinned along the chalk line. I left in the original seam for now. This is to help keep the pins from slipping and sliding around too much since the shirt is satiny.

Since I don't have a serger, I used a zig-zag stitch and sewed along the chalk line making sure to backstitch at both the top and bottom. Then followed this with a straight stitch along the same line for reinforcement.

Someday I will figure out all the stitch functions on my machine and can probably do something better than this but it works for now. From the outside it looks just as pretty as the original seam.

I finished it off by removing the old seam with pinking shears. This will help prevent fraying. They are a great thing to have if you don't have a pair! The last step I always do is pressing the new seam with my iron at the correct temperature setting for the fabric I'm working with. This gives it a more professional, less homemade look.

The shirt turned out better than new because now it fits! Are you ready to try it on yours now?
Pin It

Monday, January 16, 2012

The *Easy* Baby Blanket


My father-in-law was looking for a gift for a co-worker who had just had a baby. I wanted to make something functional and pretty but I was also short on time since I had forgotten that I had promised to make the gift. While surfing around on Pinterest (as I have been known to do), I stumbled across this delightful tutorial over at Mama Stellato.

Her pattern is just as simple as the title suggests. I was in love! Here was something that I could get done fast enough to make up for all my forgetfulness.

The front piece I used is a patterned fleece. I was able to find a cute baby themed pattern that I just loved. I found a matching piece of brown flannel for the back panel. Since the fleece is so thick and cozy, I didn't use the batting as the pattern suggested. Putting the fleece and flannel together made for a super soft and cuddly blanket. Other than that, I followed the steps outlined in the tutorial.

These are so fast to sew up that they are now part of my regular routine for my Project Linus blankets. Saves a lot of time, since I always seem to be working on a million different things.

So the next time you have procrastinated a baby gift, keep this in mind!

Wednesday, December 21, 2011

Favorite Flower Tutorials Round-up

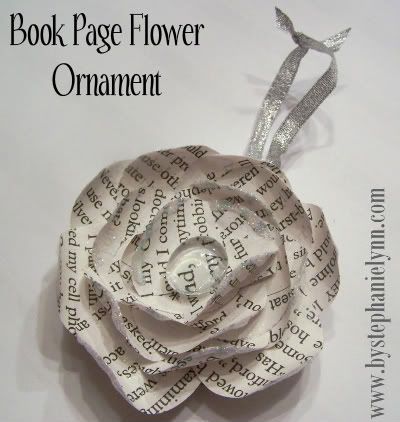
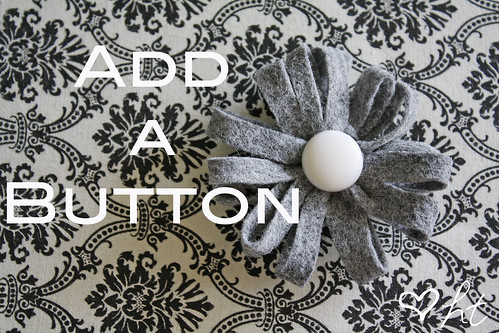
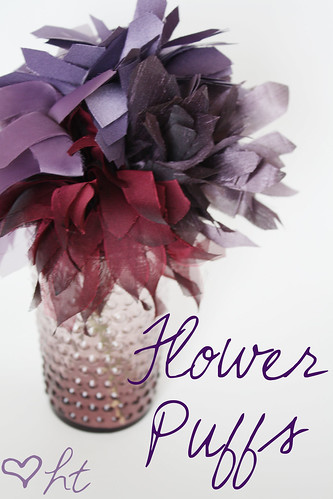
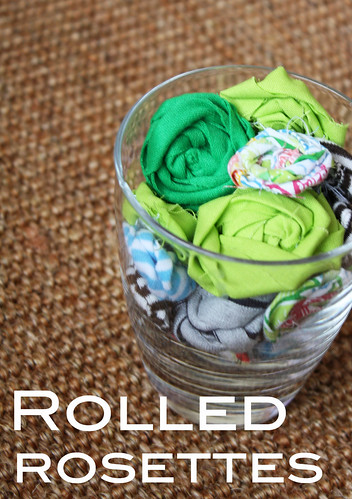
If you've ever looked for help on making any sort of crafty flower, you may have noticed that there are a million tutorials out there. It may be overwhelming to try and sort through and find the exact type of flower that you are looking for. Well, worry no more! I've sorted through dozens of tutorials and have compiled some of the best right here for you.


Flower Puffs

Felt Dahlia Flower Brooch

How to Make Felt Flowers 

  Easy Layered Felt Flowers

That should satisfy all your flower needs! If there is a flower tutorial you are looking for that I forgot to include, let me know so I can add it to the list. 

Sunday, December 11, 2011

A Few of My Favorite Things...

With all the Christmas presents I've been working on lately, I thought I would share some of Santa's little helpers with you. These are some things that I just can't live without this year:

Source: Joann.com


For those that are familiar with rotary cutters, this is for use with the Olfa Deluxe 45mm Rotary Cutter. A rotary cutter is used with a self healing cutting mat and a ruler to cut fabric and it makes cutting a dream. The pinking blade makes cutting pinked edges (zig-zag) so much easier. I've used pinking shears on so many projects but I hate how uneven my lines come out! By using the rotary cutter, the cut lines on your fabric turn out so straight and even!

Source: Amazon.com

2. Singer Stylist Sewing Machine
I recently upgraded to this sewing machine from a more basic model and I am so impressed. If I had known there was such a difference, I would have done it much sooner. This machine has more stitch functions than I have figured out what do with. It also has an automatic threader, comes with an assortment of foot attachments and is incredibly easy to use. It would be great for a beginner or even a more experienced user. It is very reasonably priced too!


Source: www.silhouetteamerica.com
The newest model is the Silhouette Cameo, it has been on my wishlist since it was announced that they were going to be putting it out this fall. This amazing little machine can do everything! It cuts vinyl - both heat transfer and indoor/outdoor vinyl - scrapbook paper and cardstock, makes temporary tattoos, cuts fabric, it can sketch designs, all sorts of great things. I've used it to make gifts, cards, home decor, t-shirts and just about everything imaginable! I really don't know what I did before I had it.


Source: www.elmers.com
4. Elmer's CraftBond Glue Spots
These handy little glue spots are great for all my paper crafts. My most common use for them is when
making cards. They are also great for scrapbooking. But using these with my latest projects - a 3D snowflake and paper chain - turned out so much better than if I had used tape like the directions said (I'm not one to follow directions anyway!). They come in a variety of sizes and I've found them all to be useful depending on the project.


Source: http://www.beaconadhesives.com
5. Fabri-tac
This is such a fantastic adhesive. Most recently, I used it to decorate Christmas stockings. I found that it worked wonderfully to apply buttons, ribbon, pom-poms and felt flowers to my stockings. Then when my friend was talking about how plain her stockings were, the first thing that came to mind was using Fabri-tac to help with decorating hers. It's great because instead of having to figure out how to sew through layers upon layers of fabric, you use a bit of this and your materials adhere quickly and effortlessly. I think it's my new favorite way to "sew!"

 Disclaimer:  I was not paid for this post. I paid for all these products with my own money and these reviews are all my personal opinion. 

What are you all loving that we should know about???

Thursday, December 1, 2011

Alphabet Soup

I had a birthday coming up for a very special one-year-old but I had no idea what to get for her. What do you get a one-year-old? I have other nieces and nephews, but it's been a bit since I've needed a gift for one that young. Off to bloggyland I went, in search of great gift ideas. It wasn't long before I came across a great project at Stitching in the Dark for a plush alphabet (updated 3/6/12: The page with the original tutorial is no longer available). Off to the sewing machine I went!

I had a charm pack (pre-cut squares) in great colors and matching flannel to use for the backing.

 I followed the guidelines in her tutorial and made my templates with Word, using font Tunga in size 400 in the outline mode.
Then I used a washable fabric marker to trace each of the letters onto a different pre-cut square.


So there should be your patterned fabric with the traced letters, batting cut to the same size and backing fabric cut to the same size.
Pin the pieces together in that order. Then carefully sew around your traced outlines with a straight stitch. I finished them by cutting the edges with pinking scissors so they won't fray.
 Then I stitched up this quick and easy drawstring tote from The Purl Bee to keep all the letters in.
 I received a sweet note that she loves it and that is the best part!

Monday, September 19, 2011

The *Easy* Empire Waist Dress

This started out to be something completely different.


I had this cute t-shirt that I wanted to make into a dress and I found a pattern that I thought would be simple enough. Well, I was totally wrong. I was so horrified by the outcome of the dress that I couldn't even take a picture of the ugly mess I had created. It was just hideous! I put the whole thing into a drawer with my other fabric to deal with later. So a few days later I tried to salvage the mess of a dress by adding a ruffle to the bottom. It just made it worse. I really should have taken pictures of this mess but it was so embarrassing. Not wanting to waste this cute shirt, I got out my rotary cutter and sliced it off the top of the mess of a dress and threw the rest away. I never wanted to look at it again. I still loved the shirt though so I was on the hunt for something to do with it. Browsing my favorite place Pinterest, I came across this darling dress from Smashed Peas and Carrots.

I LOVE this dress! The pattern is simple enough and she shows all the steps for making it. It really was an easy dress to make. In her pictures, she shows it as a maternity dress, but she comments that it would work as a regular dress as well and she even makes a child size one following the same pattern. My thoughts on making a maternity dress - I would definitely use a jersey or stretch fabric because it would allow for so much more comfort and room to grow with you. The only difficulty I had came when attaching the shirt to the skirt. I think my shirt wasn't quite as fitted at the tank top she used. If I were to do it again, I would run a gathering stitch around the bottom of the shirt and pull it until it matched the size of the skirt, then pin them together. I think it would make it much easier to attach them doing that. I used a knit t-shirt as the top, 1 & 1/2 inch elastic for the waistband because the store was out of the 2 inch and then a patterned cotton for the skirt. Following her measurements worked really well for me to make my dress.

I was worried after all the trouble I had with the first dress that something would be wrong with this one but I have washed and worn it and it has held up. It is a great dress and super comfortable too! I imagine that it would make a great maternity dress for all the mamas out there. It sews up really quickly and truly is an *easy* dress!

Friday, September 9, 2011

Learning to Make a Shirt

I love Anthropologie! Like seriously L-O-V-E! I always find the most amazing things there but I always run into a few problems. #1 My budget doesn't have room for me to buy all the great things I see. #2 About half the time, the things I find and fall in love with are out of stock. Which leads us to the story of my new shirt(s). I found this shirt, which Anthropologie no longer carries, but I have been in love with.

It looked like it would be simple enough to make - just a front, a back and a sash. Boy was I wrong! I really wish I had taken a picture of the mess of a shirt I made the first go-round. It was hideous! That's when I realized that while I can sew, I really do need some sort of direction... maybe... just a little.

Lucky for me I found Sweet Verbena on Pinterest. She has a tutorial that looks almost identical to my dream shirt! I love her!!! So the first item on my agenda was to make a shirt following this tutorial.


I used a white jersey with faint yellow apples for the body of the shirt and then a yellow cotton for the sash. I had not sewn much on jersey before and making this shirt was a breeze. I had my doubts when she said it would be easy, but it was! It really turned out like a dream!

Now I was ready to tackle my mess of a shirt from my first project. I had sewn it on 100% cotton (the pink on the left). I basically ended up ripping apart the first project and sewing it back together following her tutorial. I was actually able to save what I thought was destined for the scrap pile. 

I now have 2 new shirts. They sewed up super fast too, which was one of my favorite parts. I always love a quick and easy project!

So if you are just starting out or dusting off your machine after it's been sitting for awhile, I highly recommend this project. It's fun, easy and you'll end up with a really cute and flattering top!