Pages

Showing posts with label silhouette. Show all posts

Tuesday, February 28, 2012

Grand Finale: Craft Room Makeover

The craft room makeover is finally finished! Whew! It's been quite a month and I'm so happy with the way it has turned out. You may remember that I decided to organize my craft room/office since it was one of my projects to complete on my 30 Before 30 list. This room was in major need of a renovation as you can see from the before pictures. Since this room is both the craft room and the office it needs to be a very functional space.

My nephew's girlfriend Jennie came over and made an amazing video of the completed room for me. She is so talented and I love the video she made of the room. I felt that pictures alone couldn't give the full affect of the transformation that took place in here, so here is the completed room tour:


If the video doesn't play for you, here is the direct link to the Craft Room Makeover Tour.

I took this project on as part of the 29 Day Organizational Challenge at I'm an Organizing Junkie.  It's funny because I had been living with the chaos of the room for so long I had sort of gotten used to it. But once I decided to start organizing, I really got going and couldn't stand it anymore.

The steps I took to get started: I made lists of things to work on and projects that needed to be completed. I like making lists because it keeps me goal oriented and I can see the progress as I check things off.  Then seeing the before pictures and looking at the progress I was making really kept me motivated. I also had my sister come over and help me. We did an entire day of cleaning and organizing. It was great having her here because it kept me from getting distracted by all the little things.


The hardest part of the challenge was deciding what was really worth keeping. Of course I felt like I loved everything in here as I came across it or had the thought that it could be useful. I kept having to remind myself that if I hadn't used it recently that I probably wasn't going to anytime soon. Once I saw how much space I was creating, I started feeling better about the purge.


One of my biggest purges was fabric. Luckily my sister-in-law Cassidee is planning a project for her Gold Award in Girl Scouts that will need a lot of fabric, so I sorted through and pulled out everything I thought she could use. I also had a huge drawer of scraps and another bag under my desk. I went through all of that and narrowed it down to a small drawer of useable scraps. I also purged a lot of the decor in here. Most of that ended up going to my sister because it just happens to match her house. I really wanted to try and have the place not look like it was the room of "leftovers." The rest of the stuff I purged went into a pile to donate to Goodwill.


The best part of the whole challenge came just a few days ago when my husband was doing some work from home and I was working on some sewing. We were both in here, spread out in our areas and not in each others way at all. The most amazing thing was that there was still plenty of room to walk around too! The room is completely functional for us now and that was the main thing I set out to accomplish. 


One of the best finds in organizing the room was the 4-tier shelf I got from Lowe's. It was only $15! It fit perfectly in the closet and allowed for so much more storage space. I used a bunch of dollar store shoe boxes to organize my craft odds and ends. My sister Aspen came up with the idea for the cute labels that we put on them. I made them all with my Silhouette and the designs all came from their online store. I also got a new file box for my coupons. The old one had a broken lid so it wasn't very functional. All the couponing stuff is on one shelf and should stay nice and organized. I also know exactly what is in each box now, which makes it so much easier to find everything.


Another great find was the Closetmaid rack I used for the ribbon and paint on my wall. It's original purpose is for canned goods in the pantry but it's the perfect size for all my ribbon. I don't have to search through totes and boxes to find everything anymore. And as luck would have it, I had a bunch of mason jars that my mother-in-law gave me for Christmas and found that they were the perfect thing to sort all the buttons and embellishments into. My buttons are all sorted by color now which is so awesome!


The boxes on the shelf that hold my Silhouette and scrapbooking supplies came from Ikea and really help contain everything so that I can find it. Before they were all mixed together in a big under-bed box. Everything would get lost in the big box and I never really knew what was in there. I found out that I had 3 boxes of photo corners. The funny thing is that I can't even remember the last time I used photo corners. The pots under the shelf that hold my scissors and paintbrushes also came from Ikea. I seriously love that store! They need to build one by me so I don't always have to drive to LA every time I think of something great I need. I found it so helpful to have the painting stuff accessible the other day when I went to paint something and I could see all the brushes I have as opposed to the mess of Ziploc bags they were in before.


The best thing I did in the room was rearranging the furniture. I don't know why I didn't think of it sooner but it is so much nicer in here. With the new layout, there is an "office side" of the room and a "craft side" of the room. Everything I need is in it's own area and very organized on top of that.


Overall the biggest thing I've learned from this is not to buy more craft supplies than I need for the project I'm working on. I have so much stuff - mostly fabric - that I bought just because it was on sale. Most of it will probably never get used and ended up going in a donate pile. If I can keep that in mind in the future, I know that it will be a lot easier to maintain this room.

The greatest piece of advice I can give you in tackling an organizing project of your own is that you NEED to get rid of things. If you haven't used something recently, it needs to go. If it's not functional, it must go. If it's not your style, let it go. The thing is that if you decide a year from now you want it again, there will probably be something better available. It's not worth the clutter to hang on to things because it might be useful.

I will also be linking up at these parties.

Pin It

Thursday, February 16, 2012

What's in a Name?

There are a lot of really cute family name art pieces out there. I've even made a few for around our house. But the latest project I have been working on had me a bit puzzled. What kind of family art do you create for a "modern family" who may not all share the same last name?

Being the Shakespeare lover that I am (and having just recently watched the movie) the famous Juliet quote popped into my head:
What's Montague? It is nor hand, nor foot,
Nor arm, nor face, nor any other part 
Belonging to a man. O, be some other name!
What's in a name? That which we call a rose
By any other word would smell as sweet. ( Romeo and Juliet, Act 2, Sc. 2, 43-47)

Being a family doesn't mean that you all have to have the same family name, what matters is that you are family. After a little bit scribbling and a whole, whole lot of erasing on my scratch pad, I finally settled on this design.


I made the lettering with my Silhouette and I used the LDJ Forever Friends font. The "Our Family" is available in the Silhouette online store. The vinyl is from Expressions Vinyl in light brown. Expressions Vinyl is one of my favorite places to shop for vinyl. They always have good discount codes for their email subscribers and Facebook friends.

I really love how it turned out because the names are all connected - like a family is! It's perfect because all of the people I know with modern families can now have name art too!

I'll be linking up to my favorite parties this week.

Pin It

Wednesday, February 15, 2012

DIY: Subway Art Frame

My roommate's birthday was a few weeks back. I already had part of the gift planned - some really cool Stila eyeshadow and a few other make-up things, which I love and knew she would too. But I wanted to do something a bit more personal since she's so dear to me.

I came across this darling Subway art over at Kiki & Company. It was just the thing I was looking for!


Side note - so my friends and I always call patterns for projects "recipes" and I've had a hard time not doing that lately but I just can't help it! So...

Recipe:
You will need a blank wooden frame, acrylic paint (I used Apple Barrel by Plaid White and True Teal), scrapbook paper, white cardstock, Krylon Triple Thick Crystal Clear Glaze, sponge brush, and craft glue (I used Aleene's Quick Dry Tacky Glue).


Step 1:  
Remove the glass (or in my case plastic) from the frame.  Prime frame with 2 coats of white paint. Let dry thoroughly in between layers. Then paint 2 coats of your desired color (also drying well between layers) and let dry. 

When it is completely dry, spray the entire frame with the Krylon Triple Thick Crystal Clear Glaze. Be sure to do this in a well ventilated area like outside (my roommates always gets mad when I do this in the house). Let the frame dry really well before handling again - ask how I know about that!

Step 2:
While that is drying, you can pick out your Subway Art for the frame. Like I mentioned, mine came from Kiki & Company. You can also do a search for "Free Subway Art" on Google for more ideas.

Funny thing was that I was trying to use the red and teal design on Kiki Creates. I didn't realize until it printed that my printer was out of magenta ink. Luckily, I love the way it turned out. To make it fit in my frame, I scaled it down to size in Photoshop and printed from there. I printed it on white cardstock to help the colors really stand out and make it sturdier. 

Step 3: 
This is my favorite part of any project - embellishing! I chose to make some 3D flowers and leaves with the colored cardstock. I love it because it is two-sided! I used my Silhouette to cut them and then glued them to the frame with the craft glue. You can find some ideas to make handmade flowers on my Favorite Flower Tutorials Round-up.
The best part of this project is that you can decide how you embellish the frame. You can use ribbons, buttons, stickers or vinyl cut outs. Personalize it and make it your own.

 
It turned out perfectly and she loved it! The best part of giving it to her was that I could finally take the sign off the craft room door warning her to stay out!

Pin It

Sunday, February 12, 2012

Cupid Rhymes with Stupid

My younger sister-in-law is on her high school ASB or Student Body. They have to dress up for about every holiday and school function and when she came over to work on her Valentines to give to her friends, we decided to come up with something custom to wear for Valentine's Day.

This shirt was not our original plan however! We had planned on making the Rufflicious Top over at Polkadots on Parade. I made one the other day for my neighbor's daughter and it turned out beautifully.

We were joking around about Valentine's Day not being so much fun for her because her boyfriend had just broken up with her and so, the Cupid Valentine's Day Top was born:


Supplies needed:
1 t-shirt
freezer paper
iron
sponge brush or paint brush
cardboard or something to layer under the shirt
fabric paint (I used acrylic paint because that's all I had on hand)


To do this with the Silhouette: Tear off a piece of freezer paper the same size as the cutting mat and lay it shiny side down on the mat. I used the LD Hearts font and a cupid from the Silhouette store. Then cut the design with the "Print Paper" setting.

You can also trace a design on freezer paper by hand with an X-acto knife.

To get the stencil, peel the outside of the design off the mat. This is what you will be using. You will also need any of the small pieces such as the inside of the arrow and the hearts inside the letters. The design may curl some, but if you peel the mat away from the template rather than peeling the template off this should help it not curl so much.

Place this centered on the front of the shirt.


I always like to use a press cloth to avoid having things stick to the iron. You can also use a piece of muslin or cotton fabric if you don't have a press cloth.

Set the iron to the highest setting the fabric will allow without steam. Lay the cloth very carefully over your design and press the iron slowly over the whole design. Work carefully so you can adjust the small pieces if they happen to shift at all. I like to go over it several times to make sure that the freezer paper is adhered very well.


Your freezer paper should be stuck to the shirt like a sticker. Then place a piece of cardboard or something thick between the layers of the shirt to prevent the paint from bleeding through to the back.

Now you can use your fabric paint or acrylic paint (it might fade or be stiffer than fabric paint) and fill in your template.


Fill it in slowly to avoid big globs of paint. I did two thin layers and let them dry well in between.Then let it dry really well after the last layer of paint. I cheated and got out the heat gun since my sister-in-law was going to be taking it home soon.

When it is completely dry, peel off the stencil and you will have a totally custom Valentine's Day shirt!


I think I signed myself up to be the permanent shirt maker for all her school functions!

Pin It

Monday, January 30, 2012

Valentines for Boys 2: Superhero Valentines

Superhero Valentines: It's all that sweet stuff in disguise, so even the littlest guys will like it!

In the second edition of Valentines for Boys, it's nephew #2's turn. See Valentines for Boys: Part 1 for more ideas. Nephew #2 was just as excited to pick out his own design and quickly selected the Superhero Valentines.


Supplies: 30 tootsie pops (I used the Valentine's Day themed), cardstock in a variety of colors, tape or glue dots, glue stick, scissors, hole punch

I created a black and white template printable, you can download it here. Print the template on any colored cardstock you desire. 

To make the superhero emblem on the cape, out came the trusty Silhouette. I found a Superhero design in their store and used the LD Blankie font. The Superhero design was two pieces, so I decided to only use the inner piece. For instructions on how to print and cut, check out the tutorial on the Silhouette FAQ page.

It would also be easy to make these with a printer and cardstock and then cut a design by hand.

To assemble: Cut the shapes from the template by hand. Then punch a hole in the top of the capes with the hole punch. Attach your superhero emblem using the glue stick. The cape slides on to the stick of the tootsie pop and shouldn't need anything to secure it - the wrapper helps it stay in place. Then attach the mask with a glue dot or piece of tape.

Perfect for any little boy!


Pin It

Sunday, January 29, 2012

Valentines for Boys: You're the Bomb

There are so many cute things for kids around Valentine's Day. Seeing all the cute things everywhere was giving me the itch to get crafty but I have no kids of my own. So the other day, I had a bright idea - why not make fun stuff for other kids! First on the list, my adorable nephews.

I sent my sis-in-law a bunch of great ideas for things I could make for the boys to take to school for Valentine's Day. The boys were so excited and quickly picked out their favorites.

These are for nephew #1 and are inspired the Valentine Doings post at Make it Do.


1. Supplies needed: 30 individual size Kit-kat bars or other small candy, 30 - 2" by 2" squares of red scrapbook paper, 30 pieces of 12" black pipe cleaner, scrapbook adhesive or tape, 2 sheets of 12x12 red scrapbook paper for the tags.

2. As shown in the picture, place a strip of adhesive down the edge of the square of paper. Place another strip on the opposite edge, on the same side of the paper. Line up one edge of the candy bar on the paper and press down firmly.

3. Roll the paper around the whole way until it sticks on the opposite side. The candy bar should be completely covered. If you are using tape, just roll the paper around the candy and tape the ends closed.

4. Cut your pieces of pipe cleaner into 2 lengths. Four inches long for the fuse and 8 inches long for wrapping around the stack of candy. You should end up with 30 pieces in each pile.


To begin assembling, stack 3 wrapped pieces of candy together in your hand. Put one piece of "fuse" pipe cleaner in the middle of the stack. Then take your long piece of pipe cleaner and wrap securely around the outside of the bundle.

It should look like this when you have them to this point.

To make the tags, I got out my Silhouette. I found a great circle tag from the Silhouette store and loved the way the LD Petticoat Twist font looked for these. I used the print and cut instructions found on the Silhouette FAQ page.

To do this without the Silhouette, you can type up tags in Word and cut them out using a circle template and hole punch.


Finishing touches: I hung the tags on the pieces of pipe cleaner that were hanging out and then tucked the excess behind to help hold them in place.

Now all he has to do is sign his name and try not to eat them before Valentine's Day gets here!

Take a second to vote for these on Craftsy by giving them a heart. Thanks for your support!

Pin It

Friday, January 20, 2012

Pantry Organizing {52 Week Organized Home Challenge}

This week's challenge from Home Storage Solutions is decluttering and organizing the pantry, spices and food storage spaces. A few weeks ago, I organized my spices because they were an out of control mess! The rest of the pantry really needed some help though so I was excited to start this challenge.

Join the 52 Week Challenge with me and follow along on here as I get organized!

This is the top of my pantry. Stuff was just shoved everywhere before I started cleaning! There were random tupperware containers at the top, even though we have a tupperware cupboard. The baskets were overflowing to the point that if you tried to take them down to find something, everything fell on you or the floor.

After: The appliances are neatly arranged on the right side and easy to get to. The baskets are cleaned out and labeled. So much better!

The middle section of the pantry was probably the hardest! I realized as I was cleaning it out that we had so much stuff in there that I had no clue we even had. A lot of stale chips for one thing. I headed straight to the Dollar Tree to look for some things to help organize this mess.

After: I bought some stacking shelves for the canned goods. It seems to really help us see what we have and organize things better by category. I got out my Silhouette and labeled a lot of things. More for the sake of others. It wouldn't be good to mistake salt for sugar. The medicine area is so much neater too. Everything is in baskets and easy to get to. 


The bottom section was kind of chaotic before I tackled it. We had baking racks in the back that were a pain to get to. The mixing bowls were hidden in that weird back corner and with most of the stuff down here, we always seemed to knock something over when we tried to get something else out.

After: I stacked all the linens on the side - seemed to make more sense for them all to be together. The mixing bowls went into a different cupboard in the kitchen. I made another appliance shelf for the miscellaneous things down here including our waffle iron that was lost in the back. I reorganized all the ziplock bags and plastic wrap type stuff where they wouldn't be in the way of other things. Then I found a great place for the baking racks and our cutting boards (those were in another cupboard and impossible to get to). I also swept out the bottom and found a home for our lunch bags.

Looking at it now, I can't believe we could find anything in the mess before! It's no wonder we would open the door and decide we had nothing to eat. All we could see was peanut butter, tuna and chips. Not a great combination!


Tuesday, January 3, 2012

DIY: Monogram Coasters

My brother-in-law has been wanting me to make him coasters ever since I got my Silhouette and he saw all the great things I was making with it. I was planning on making them for his birthday and then somehow it didn't get done in time. So I made sure to put them on the list for his Christmas stocking. They turned out to be such a fast and easy project, I don't know why I didn't get them done sooner!

I found these great tiles at Home Depot packaged in a set of 9 for only a few bucks. They are nice unglazed tiles so they should be perfect for absorbing condensation from drinks.

I cut squares of craft felt just a tad smaller than the tiles. I used my rotary cutter and ruler to get nice even squares. (Don't you love my carpet background? I had to work on the floor because every other space in the house was covered in Christmas chaos!) The felt is a great backing so that the tiles don't scratch whatever surface the coasters are going to be used on.

I coated one side of the felt with Fabri-tac and made sure to give it a really good coat. I wanted to make sure that all of the felt was going to stick to the tile.

Then I carefully lined it up with the back of the tile and smoothed it out to make sure that there were no bumps and that the whole thing was secured. I did this to all four of the tiles that I was making.

When they were all glued, I got a big stack of books and set them all under it to dry to make sure they set up really well.

Now for the monograms! On my trusty Silhouette, I settled on the LD Old Glory font and stretched it to a good size to be centered on the tiles. I made one and then copied it so they would all be the same size. Weeding out the little holes in the "Cs" was quite a task but I got them all done. I measured and marked each tiles to be sure the were centered and then applied the vinyl. I have step by step instructions on applying vinyl on this tutorial. If you don't have a Silhouette, you can always use an X-acto knife and cut a design by hand. 

He loved them so much that he wants me to make more. Let's see if I can get them done before next Christmas!

Linked up at:  Fun to Craft 'Look At Me' Party, Sew Can Do Craftastic Monday, Hope Studios Tutorial Tuesday, My Girlish Whims

Thursday, December 22, 2011

Last Minute Decorations

Still needing last minute decorations? I have a few quick and easy projects that you can make in 30 minutes or less. Super cheap too! Always my favorite way to make crafts!

Up first stockings. I have two designs for you - one more traditional and one a little bit funky.


The first set, I made with my friend Melissa for her house. She was not happy with her plain stockings, so we decided to dress them up a bit. We traced out some sleeves to fit over the heels and toes of the stocking on a scratch piece of paper, then used that template as a pattern for some fabric she had on hand. I added about a half an inch seam allowance on all sides. Then sewed them up to fit on the ends of the stockings. That's the pretty black and white fabric you see on the stockings in the picture above. We attached them to the stockings with Fabri-tac. To make the sleeves look nice and finished she added decorative ribbons as a border around the tops using the Fabri-tac. On the tops of each stocking, we added more ribbon and some cute buttons, also using the handy-dandy Fabri-tac. I seriously LOVE that stuff! Very thrifty project and made the stockings look so much fancier.


 The second set I made are my fun and funky stockings. I got them at Target for $1.00 each. They came with the rick-rack already on them. But they still looked too plain for my taste. So, out came the craft supplies. Fabri-tac to the rescue again! I put on buttons, ribbon, some left over pom-pom trim and my favorite - a felt flower with some tulle underneath.


The tutorial on the felt flower can be found here at Infarrantly Creative. It is super easy and probably my favorite way to make felt flowers. You can whip out a bunch of them in a short amount of time!

Next is a super fast and easy Nativity. It is not very expensive to make at all.

First you will need a plate. Whatever suits your style. You can usually find cheap ones in the clearance section of Ikea and Pier One or grab one at the Dollar Store.
That's where I typically head when I need them for projects.
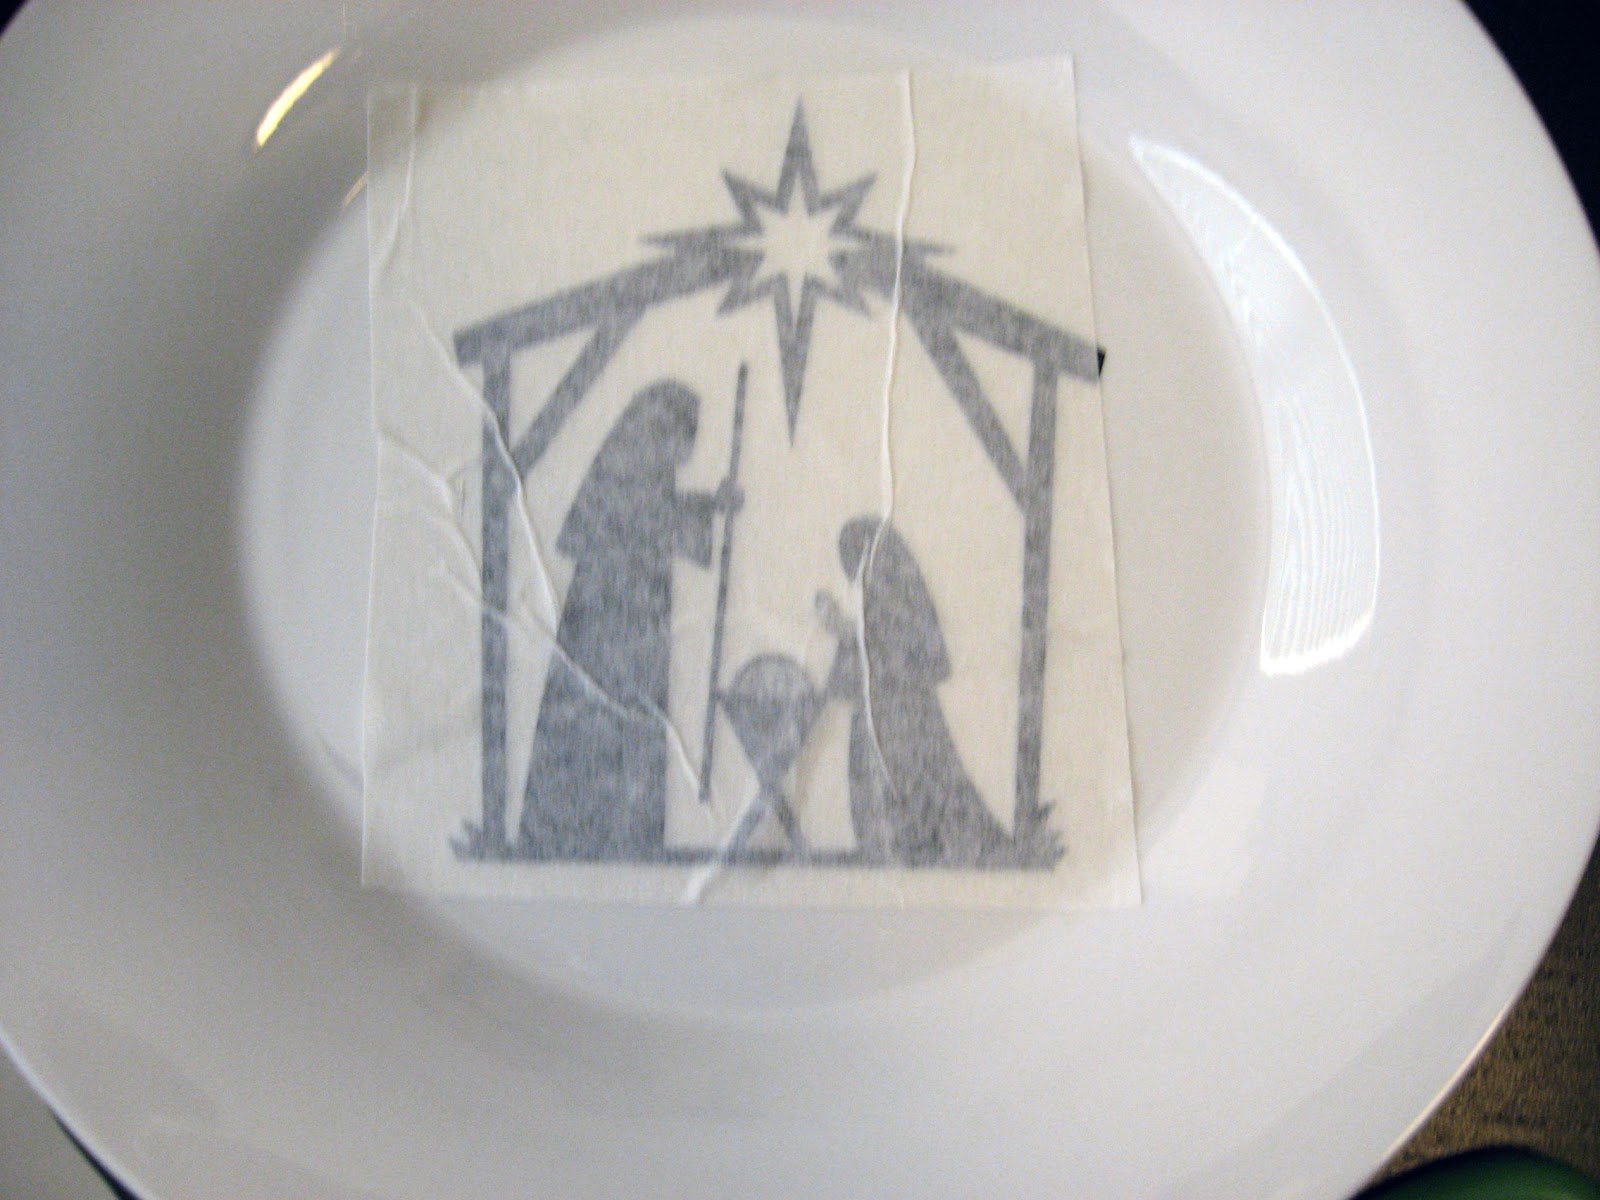
Then I got out my trusty Silhouette. I found the design for the Nativity in their online store. It's the "One-piece Nativity." I cut it and weeded out the extra vinyl.


Then applied the transfer tape and placed it on the plate.

Voila! Fast and easy Nativity! This one is a gift for my mother-in-law who collects Nativities. I guarantee this is one she doesn't already have.

*If you don't have a Silhouette, you can still make this project. Look for a great sticker from Joann, Amazon or Etsy. They are all likely to have something you'd like. Apply some adhesive such as Zig 2-way glue to the back of the sticker and apply it to your plate. It should have a permanent bond and look just as beautiful!