Pages

Showing posts with label gift ideas. Show all posts

Monday, May 7, 2012

Package Pals Craft Exchange

Over at C.R.A.F.T., Jamie hosted another great Package Pals exchange. This time around I got paired with Ami from AliLily. She is so fun and we have become great friends. Stop by her blog because she has great recipes, craft tutorials and you will LOVE the jewelry she makes!

Participating in Package Pals is a blast because not only do you get to make something crafty for someone else, but you get the surprise of an awesome package in the mail.


After getting to know Ami, I found out her favorite color was orange so I went with a totally orange themed package.

Thursday, April 12, 2012

DIY: Diaper Cake and Cupcake Washcloths

My sister is well known for her beautiful diaper cakes, so I knew that I had to make one for her shower. The only problem was that I had never made a diaper cake before! It was going to be a big challenge. My mother and I came up with the idea of making a diaper cake and matching washcloth cupcakes.

Black and pink diaper cake


As a base, I used a dollar store platter, then taped a paper towel roll standing up in the center to have something sturdy to build the cake around. The shower theme was pink and black so I wrapped each layer of diapers with coordinating fabric to hide the white and yellow diapers.

Sunday, March 25, 2012

The *Easy* Baby Blanket: Take 2

Spring is in the air around here and everyone I know is having babies. I have been a busy bee making all sorts of things for little ones. I think baby gifts are one of my most favorite gifts to make because they are so cute!

A couple of our best friends just recently had their first boy and I wanted to make them something bright and fun for him. I remembered The *Easy* Baby Blanket I had made awhile back and thought that something like it could be the perfect gift, so it was off to the craft room once again.


This time I decided to jazz it up a bit and make a 4 patch blanket. It is just as easy as the original and sews up so quickly!

Monday, March 5, 2012

DIY: Crochet Hook Clutch

At the end of January, a bunch of us signed up for C.R.A.F.T's Package Pal's Party. It's a fun way to make a new friend and exchange really awesome (crafty) goodies with them.

My package pal is Tres over at Tres Chic Nails. She also runs another great blog - The Inked Hooker. I was super excited when I found out that we were matched up because she can crochet! As I may have mentioned, I am totally incapable. She was super excited too because I can sew. We couldn't have been matched more perfectly! Her package to me is in transit and should arrive any day.

Since she is an avid crocheter, I knew just what to make her. I came across this lovely little Crochet Hook Clutch over at Little Birdie Secrets. They give a great tutorial on how to make it, but it does take some patience.


Tres mentioned that her favorite colors were red and black and while I was hitting up one of the local quilting stores, I fell in love with the gorgeous fabric


I picked a contrasting inside fabric for the hook pockets and made a small pocket for her needles. I used the measurements in the tutorial as guidelines for where to sew the hook pockets. I also sewed a bigger pocket that could be used for small scissors or a wider hook.


The whole package included the hook clutch, a hook sizing ruler and a cute California postcard.

I heard back from Tres recently and she just loves it, which makes me soooo happy!

If you get the chance to do the Package Pals, you definitely should. It's a ton of fun!

I will also be linking up at these parties this week.

Pin It

Tuesday, February 21, 2012

The Cozy Caterpillar

After spending a couple hours out shopping with my one year old nephew, I realized that babies go through a TON of socks! He would go into the store with two socks and inevitably by the time we left there would be one lonely sock on his foot.

I realized that the perfect gift for his first birthday would be some baby socks. I mean the more he has the better, right?! Especially since he seems to be constantly losing them.

I didn't want to just throw a bunch of socks in the bag and call it good either because that just didn't seem fun. So I came up with the "Cozy Caterpillar" baby socks gift. It's super cute and easy to make!


Ingredients:
About a dozen baby socks (boy or girl)
1 pipe cleaner
2 mini pop-poms
2 buttons
Green shredded paper
Note: I have double stick tape pictured but I found that Elmer's glue dots worked better for part of it, so I ended up using both
Not pictured: Container to put it in (I used a cookie tin)

Step 1: Take one of the baby socks and roll it up as seen in the picture.

Step 2: Take the first baby sock and put it down inside the foot of the matching sock.

Step 3: Starting at the opening of the sock, roll it around the foot so that you end up making a ball.
Step 4: Do this with all the remaining socks. Then decide which pattern you would like your caterpillar to have. There was only one red sock with mine, so I made that the head.

Step 5: Cut 2 pieces of pipe cleaner, each about 3 inches long. Wrap the bottoms together to form a "V." Bend the base of the "V" and attach it to the top of the head with the glue dots. Using the glue dots again, attach the pom-poms to the tops of the pipe cleaners and then attach the eyes. You can see why I changed it and went with the glue dots instead. The tape just looks messy!

Step 6: Place a piece of double stick tape on the bottom of each sock and attach them to your container. The double stick tape worked perfectly for this.
I made a zig-zag pattern with the socks. First, to get them all to fit and second because I thought it was cute and wiggly.


Step 7: Finish by filling in around your caterpillar with your paper shreds. I made mine by running 2 different colors of green paper through my shredder.


There you have it! A cute and fun way to give baby socks!

I will be linking up to my favorite parties this week.

Pin It

Thursday, February 16, 2012

What's in a Name?

There are a lot of really cute family name art pieces out there. I've even made a few for around our house. But the latest project I have been working on had me a bit puzzled. What kind of family art do you create for a "modern family" who may not all share the same last name?

Being the Shakespeare lover that I am (and having just recently watched the movie) the famous Juliet quote popped into my head:
What's Montague? It is nor hand, nor foot,
Nor arm, nor face, nor any other part 
Belonging to a man. O, be some other name!
What's in a name? That which we call a rose
By any other word would smell as sweet. ( Romeo and Juliet, Act 2, Sc. 2, 43-47)

Being a family doesn't mean that you all have to have the same family name, what matters is that you are family. After a little bit scribbling and a whole, whole lot of erasing on my scratch pad, I finally settled on this design.


I made the lettering with my Silhouette and I used the LDJ Forever Friends font. The "Our Family" is available in the Silhouette online store. The vinyl is from Expressions Vinyl in light brown. Expressions Vinyl is one of my favorite places to shop for vinyl. They always have good discount codes for their email subscribers and Facebook friends.

I really love how it turned out because the names are all connected - like a family is! It's perfect because all of the people I know with modern families can now have name art too!

I'll be linking up to my favorite parties this week.

Pin It

Monday, January 16, 2012

The *Easy* Baby Blanket


My father-in-law was looking for a gift for a co-worker who had just had a baby. I wanted to make something functional and pretty but I was also short on time since I had forgotten that I had promised to make the gift. While surfing around on Pinterest (as I have been known to do), I stumbled across this delightful tutorial over at Mama Stellato.

Her pattern is just as simple as the title suggests. I was in love! Here was something that I could get done fast enough to make up for all my forgetfulness.

The front piece I used is a patterned fleece. I was able to find a cute baby themed pattern that I just loved. I found a matching piece of brown flannel for the back panel. Since the fleece is so thick and cozy, I didn't use the batting as the pattern suggested. Putting the fleece and flannel together made for a super soft and cuddly blanket. Other than that, I followed the steps outlined in the tutorial.

These are so fast to sew up that they are now part of my regular routine for my Project Linus blankets. Saves a lot of time, since I always seem to be working on a million different things.

So the next time you have procrastinated a baby gift, keep this in mind!

Tuesday, January 3, 2012

DIY: Monogram Coasters

My brother-in-law has been wanting me to make him coasters ever since I got my Silhouette and he saw all the great things I was making with it. I was planning on making them for his birthday and then somehow it didn't get done in time. So I made sure to put them on the list for his Christmas stocking. They turned out to be such a fast and easy project, I don't know why I didn't get them done sooner!

I found these great tiles at Home Depot packaged in a set of 9 for only a few bucks. They are nice unglazed tiles so they should be perfect for absorbing condensation from drinks.

I cut squares of craft felt just a tad smaller than the tiles. I used my rotary cutter and ruler to get nice even squares. (Don't you love my carpet background? I had to work on the floor because every other space in the house was covered in Christmas chaos!) The felt is a great backing so that the tiles don't scratch whatever surface the coasters are going to be used on.

I coated one side of the felt with Fabri-tac and made sure to give it a really good coat. I wanted to make sure that all of the felt was going to stick to the tile.

Then I carefully lined it up with the back of the tile and smoothed it out to make sure that there were no bumps and that the whole thing was secured. I did this to all four of the tiles that I was making.

When they were all glued, I got a big stack of books and set them all under it to dry to make sure they set up really well.

Now for the monograms! On my trusty Silhouette, I settled on the LD Old Glory font and stretched it to a good size to be centered on the tiles. I made one and then copied it so they would all be the same size. Weeding out the little holes in the "Cs" was quite a task but I got them all done. I measured and marked each tiles to be sure the were centered and then applied the vinyl. I have step by step instructions on applying vinyl on this tutorial. If you don't have a Silhouette, you can always use an X-acto knife and cut a design by hand. 

He loved them so much that he wants me to make more. Let's see if I can get them done before next Christmas!

Linked up at:  Fun to Craft 'Look At Me' Party, Sew Can Do Craftastic Monday, Hope Studios Tutorial Tuesday, My Girlish Whims

Wednesday, December 28, 2011

Easy Afternoon Project: Finger Knitting Tutorial

I have tried to learn how to crochet. Sometime I will post the picture of the sad little scarf I made when my sister made me sit down and learn. It is just not something I think I will ever grasp the concept of. In my many craft endeavors, I had amassed quite a collection of yarn, even without being crocheter/knitter. In her efforts to get me to do something fun with all the yarn, my sister decided that I would learn how to finger knit. Surprisingly, finger knitting is something that is totally easy and fun to do. I made all sorts of scarves for the women in my family this Christmas and they were a huge hit!

I found some great easy tutorials on how to make these scarves. They are so fast that you can make up a bunch in an afternoon or evening while watching your favorite show. Plus they are a great project for kids to do.

At Lines Across, they have an easy to follow Finger Knitting Tutorial and I love that they show you how to change yarn colors.

And over at Maggie Whitley, there is another great Finger Knitting Garland & Necklace Tutorial. My favorite part is that she gives really great instructions and photos on how to tie off when you are finished with your scarf.

For my scarves, I used 2 strands of yarn. One strand of regular yarn and one strand of Fun Fur. I found that this gave it a wonderful thickness and the Fun Fur gave it some extra flair.

Have fun "knitting!"

Thursday, December 22, 2011

Last Minute Decorations

Still needing last minute decorations? I have a few quick and easy projects that you can make in 30 minutes or less. Super cheap too! Always my favorite way to make crafts!

Up first stockings. I have two designs for you - one more traditional and one a little bit funky.


The first set, I made with my friend Melissa for her house. She was not happy with her plain stockings, so we decided to dress them up a bit. We traced out some sleeves to fit over the heels and toes of the stocking on a scratch piece of paper, then used that template as a pattern for some fabric she had on hand. I added about a half an inch seam allowance on all sides. Then sewed them up to fit on the ends of the stockings. That's the pretty black and white fabric you see on the stockings in the picture above. We attached them to the stockings with Fabri-tac. To make the sleeves look nice and finished she added decorative ribbons as a border around the tops using the Fabri-tac. On the tops of each stocking, we added more ribbon and some cute buttons, also using the handy-dandy Fabri-tac. I seriously LOVE that stuff! Very thrifty project and made the stockings look so much fancier.


 The second set I made are my fun and funky stockings. I got them at Target for $1.00 each. They came with the rick-rack already on them. But they still looked too plain for my taste. So, out came the craft supplies. Fabri-tac to the rescue again! I put on buttons, ribbon, some left over pom-pom trim and my favorite - a felt flower with some tulle underneath.


The tutorial on the felt flower can be found here at Infarrantly Creative. It is super easy and probably my favorite way to make felt flowers. You can whip out a bunch of them in a short amount of time!

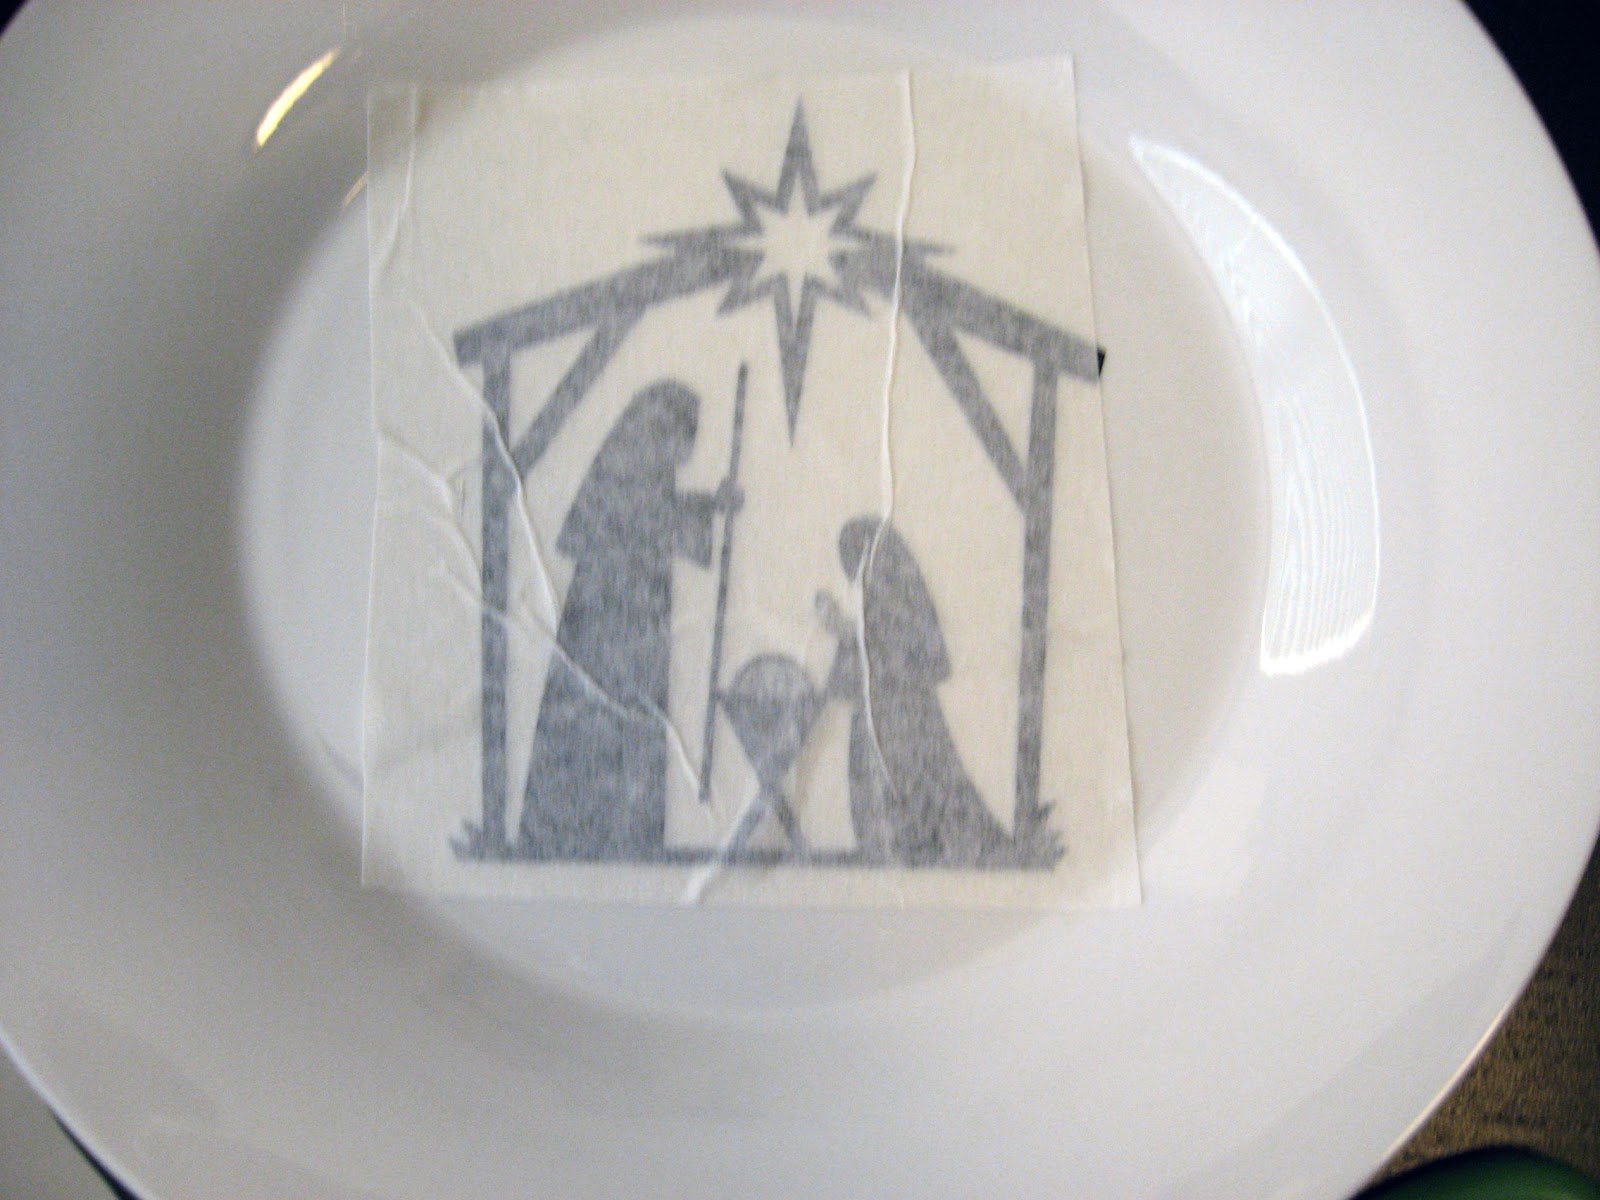
Next is a super fast and easy Nativity. It is not very expensive to make at all.

First you will need a plate. Whatever suits your style. You can usually find cheap ones in the clearance section of Ikea and Pier One or grab one at the Dollar Store.
That's where I typically head when I need them for projects.
Then I got out my trusty Silhouette. I found the design for the Nativity in their online store. It's the "One-piece Nativity." I cut it and weeded out the extra vinyl.


Then applied the transfer tape and placed it on the plate.

Voila! Fast and easy Nativity! This one is a gift for my mother-in-law who collects Nativities. I guarantee this is one she doesn't already have.

*If you don't have a Silhouette, you can still make this project. Look for a great sticker from Joann, Amazon or Etsy. They are all likely to have something you'd like. Apply some adhesive such as Zig 2-way glue to the back of the sticker and apply it to your plate. It should have a permanent bond and look just as beautiful!

Sunday, December 11, 2011

A Few of My Favorite Things...

With all the Christmas presents I've been working on lately, I thought I would share some of Santa's little helpers with you. These are some things that I just can't live without this year:

Source: Joann.com


For those that are familiar with rotary cutters, this is for use with the Olfa Deluxe 45mm Rotary Cutter. A rotary cutter is used with a self healing cutting mat and a ruler to cut fabric and it makes cutting a dream. The pinking blade makes cutting pinked edges (zig-zag) so much easier. I've used pinking shears on so many projects but I hate how uneven my lines come out! By using the rotary cutter, the cut lines on your fabric turn out so straight and even!

Source: Amazon.com

2. Singer Stylist Sewing Machine
I recently upgraded to this sewing machine from a more basic model and I am so impressed. If I had known there was such a difference, I would have done it much sooner. This machine has more stitch functions than I have figured out what do with. It also has an automatic threader, comes with an assortment of foot attachments and is incredibly easy to use. It would be great for a beginner or even a more experienced user. It is very reasonably priced too!


Source: www.silhouetteamerica.com
The newest model is the Silhouette Cameo, it has been on my wishlist since it was announced that they were going to be putting it out this fall. This amazing little machine can do everything! It cuts vinyl - both heat transfer and indoor/outdoor vinyl - scrapbook paper and cardstock, makes temporary tattoos, cuts fabric, it can sketch designs, all sorts of great things. I've used it to make gifts, cards, home decor, t-shirts and just about everything imaginable! I really don't know what I did before I had it.


Source: www.elmers.com
4. Elmer's CraftBond Glue Spots
These handy little glue spots are great for all my paper crafts. My most common use for them is when
making cards. They are also great for scrapbooking. But using these with my latest projects - a 3D snowflake and paper chain - turned out so much better than if I had used tape like the directions said (I'm not one to follow directions anyway!). They come in a variety of sizes and I've found them all to be useful depending on the project.


Source: http://www.beaconadhesives.com
5. Fabri-tac
This is such a fantastic adhesive. Most recently, I used it to decorate Christmas stockings. I found that it worked wonderfully to apply buttons, ribbon, pom-poms and felt flowers to my stockings. Then when my friend was talking about how plain her stockings were, the first thing that came to mind was using Fabri-tac to help with decorating hers. It's great because instead of having to figure out how to sew through layers upon layers of fabric, you use a bit of this and your materials adhere quickly and effortlessly. I think it's my new favorite way to "sew!"

 Disclaimer:  I was not paid for this post. I paid for all these products with my own money and these reviews are all my personal opinion. 

What are you all loving that we should know about???

Thursday, December 1, 2011

Anthro-Inspired Necklace

Oh Anthropologie, how I love to look at EVERYTHING you make! But my budget would seriously be ruined if I bought some of the things you have. Like this. I love it! Like seriously LOVE it. I would ask anyone for it for Christmas but there are two problems - 1. No one in their right mind would spend $148 on it for me, 2. It's no longer in stock. So being the crafty person I am, I decided that I could make something that would satisfy my urge for this beauty.

My version is made of scraps of miscellaneous fabrics and ribbon from my overflowing scrap drawer, in a palette suitable to my wardrobe. For the clasp, I tied a knot in one end and made a loop out of the other so that it hooks together. The clasp looks similar to the Anthropologie necklace. I love the finished necklace! And the best part was it was completely free! I already had everything to make it.

Oh and you also get to see my new hair.The pink & blue is gone. I went in to get it cut and had a picture of the new style I wanted, which had a new color in it too. My stylist loved the color and convinced me to try it. It didn't take much convincing (I just had pink & blue, right). Her argument was, "If you don't like it, we'll change it again." Sounded great to me! Well, I love it! It just might last awhile.

Alphabet Soup

I had a birthday coming up for a very special one-year-old but I had no idea what to get for her. What do you get a one-year-old? I have other nieces and nephews, but it's been a bit since I've needed a gift for one that young. Off to bloggyland I went, in search of great gift ideas. It wasn't long before I came across a great project at Stitching in the Dark for a plush alphabet (updated 3/6/12: The page with the original tutorial is no longer available). Off to the sewing machine I went!

I had a charm pack (pre-cut squares) in great colors and matching flannel to use for the backing.

 I followed the guidelines in her tutorial and made my templates with Word, using font Tunga in size 400 in the outline mode.
Then I used a washable fabric marker to trace each of the letters onto a different pre-cut square.


So there should be your patterned fabric with the traced letters, batting cut to the same size and backing fabric cut to the same size.
Pin the pieces together in that order. Then carefully sew around your traced outlines with a straight stitch. I finished them by cutting the edges with pinking scissors so they won't fray.
 Then I stitched up this quick and easy drawstring tote from The Purl Bee to keep all the letters in.
 I received a sweet note that she loves it and that is the best part!

Monday, November 7, 2011

DIY Christmas List

There are a little less than two months left until Christmas. Still plenty of time to make presents for all you do-it-yourselfers. I need to get my butt in gear with my homemade projects but instead this morning I have been playing around on the computer looking for more projects to make. Like I need to add to my to-do list.

This morning I found all kinds of great inspiration for great DIY projects for Christmas presents. Things like neighbor gifts, stocking stuffers, great gifts for guys (because we know how hard they can be to shop for) and a lot of other fun things. And rather than keep them all to myself, I thought it might be nice to share them with you all.

One of the most comprehensive lists I found was on Tip Junkie. They are a great site if you haven't checked them out before. They have all kinds of great craft projects! The amazing thing I found was basically a search engine for gifts. You can search by gifts for everyone, kids, babies, neighbors, pets, teachers, men, grandparents, etc. The list goes on and on. It's really great! Check it out for yourself here.

Tip Junkie also has a link to all sorts of great Christmas projects at their "Christmas in July" page. There are great stocking stuffers, ornaments, party themes, Christmas Advents and other fun things. You can find all of that here.


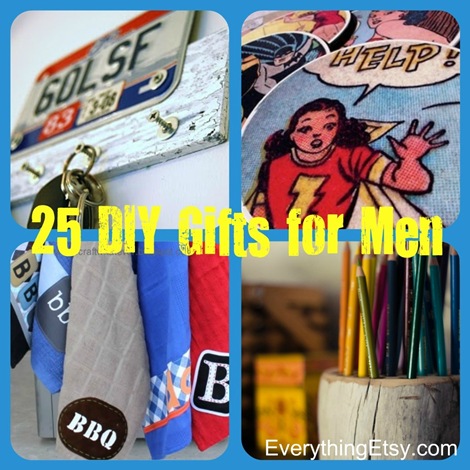
Some of the hardest people on my list to shop for are the men. I try to come up with unique things to buy them every year but it seems to get harder and harder as the years go on. One of the hardest parts is coming up with fun stuff to go in their stockings. You can only have so many tape measures! I searched and searched for hours for great DIY men's gifts and finally found Everything Etsy. They have a great list of 25 DIY men's gifts that I think might save me this year! They also have a link to a long list of other wonderful tutorials of DIY gifts for men. I know I'm going to find great things on there.


Kojo Designs did an whole series of great gifts for guys. These gifts are some really wonderful things that I know the guys in my life would actually like and use. The link will take you to the search for all the related posts of guy gifts on the site. You can scroll through and see all the great stuff they have. One of my favorites is The Handy and Manly Garage Hook System. I can think of a few people who might like something like this.

And the last thing I've got for you this morning comes from Limefish Studio. She complied a list of 101 DIY tutorials and recipes for gifts. These are great gifts not only for Christmas but for any occasion. It is an incredible list, be sure to check it out!

I hope these help spark your creativity and help your finish your holiday shopping list.