Pages

Wednesday, December 28, 2011

Easy Afternoon Project: Finger Knitting Tutorial

I have tried to learn how to crochet. Sometime I will post the picture of the sad little scarf I made when my sister made me sit down and learn. It is just not something I think I will ever grasp the concept of. In my many craft endeavors, I had amassed quite a collection of yarn, even without being crocheter/knitter. In her efforts to get me to do something fun with all the yarn, my sister decided that I would learn how to finger knit. Surprisingly, finger knitting is something that is totally easy and fun to do. I made all sorts of scarves for the women in my family this Christmas and they were a huge hit!

I found some great easy tutorials on how to make these scarves. They are so fast that you can make up a bunch in an afternoon or evening while watching your favorite show. Plus they are a great project for kids to do.

At Lines Across, they have an easy to follow Finger Knitting Tutorial and I love that they show you how to change yarn colors.

And over at Maggie Whitley, there is another great Finger Knitting Garland & Necklace Tutorial. My favorite part is that she gives really great instructions and photos on how to tie off when you are finished with your scarf.

For my scarves, I used 2 strands of yarn. One strand of regular yarn and one strand of Fun Fur. I found that this gave it a wonderful thickness and the Fun Fur gave it some extra flair.

Have fun "knitting!"

Monday, December 26, 2011

December Recipe Roundup or Goal #6


I have been working on trying at least one new recipe a week as a goal in my 30 Before 30 project. I've done pretty well so far but I figured to keep accountable, I should share some of the recipes
I have tried with the rest of you.

Here is the progress so far:


Week of December 1st: The Hungry Girl Crunchwrap 
If you love the Taco Bell Crunchwrap Supreme as much as I do, this is a must have. It is such a healthier option and is amazingly delicious! I have now made it a regular on the menu.


This was my first time trying and cooking quinoa. It smells very weird when it's cooking but the cereal was really pretty good. I refrigerated the leftovers since it made several servings and it reheated very nicely the next day.

This blog is absolutely wonderful. She makes delicious and healthy desserts. If you have a sweet tooth, you can't beat that. I made these blondies. You might look at the recipe and think that there is no way that it would taste good but believe me, everyone that tried them could not believe that they were actually good for you. They are beyond delicious!


Week of December 19th: Pillsbury Reindeer Cookies
My grandma and I made these to take to put in neighbor baskets and to take to family Christmas. They are so easy and turned out really cute. I couldn't find peanut butter or gingerbread dough (probably because they were sold out), so we just used sugar cookie dough and they still looked great!

I also made A Busy Mom of Two's Holiday Traditions Breakfast Casserole. We decided to do breakfast for dinner on Christmas Eve when we got together with my in-laws. The casserole was the perfect thing to make before heading to church and have ready to pop in the oven when we got back. It was DELICIOUS! There weren't any leftovers to take home. I guess I'll be making that again soon, since it was such a big hit!

Sunday, December 25, 2011

Merry Christmas from Crazy Daze Designs


Merry Christmas to you and your families. I hope you all have a wonderful Christmas Day and safe travels if you are out and about. 

Merry Christmas and Happy Holidays!

Thursday, December 22, 2011

Last Minute Decorations

Still needing last minute decorations? I have a few quick and easy projects that you can make in 30 minutes or less. Super cheap too! Always my favorite way to make crafts!

Up first stockings. I have two designs for you - one more traditional and one a little bit funky.


The first set, I made with my friend Melissa for her house. She was not happy with her plain stockings, so we decided to dress them up a bit. We traced out some sleeves to fit over the heels and toes of the stocking on a scratch piece of paper, then used that template as a pattern for some fabric she had on hand. I added about a half an inch seam allowance on all sides. Then sewed them up to fit on the ends of the stockings. That's the pretty black and white fabric you see on the stockings in the picture above. We attached them to the stockings with Fabri-tac. To make the sleeves look nice and finished she added decorative ribbons as a border around the tops using the Fabri-tac. On the tops of each stocking, we added more ribbon and some cute buttons, also using the handy-dandy Fabri-tac. I seriously LOVE that stuff! Very thrifty project and made the stockings look so much fancier.


 The second set I made are my fun and funky stockings. I got them at Target for $1.00 each. They came with the rick-rack already on them. But they still looked too plain for my taste. So, out came the craft supplies. Fabri-tac to the rescue again! I put on buttons, ribbon, some left over pom-pom trim and my favorite - a felt flower with some tulle underneath.


The tutorial on the felt flower can be found here at Infarrantly Creative. It is super easy and probably my favorite way to make felt flowers. You can whip out a bunch of them in a short amount of time!

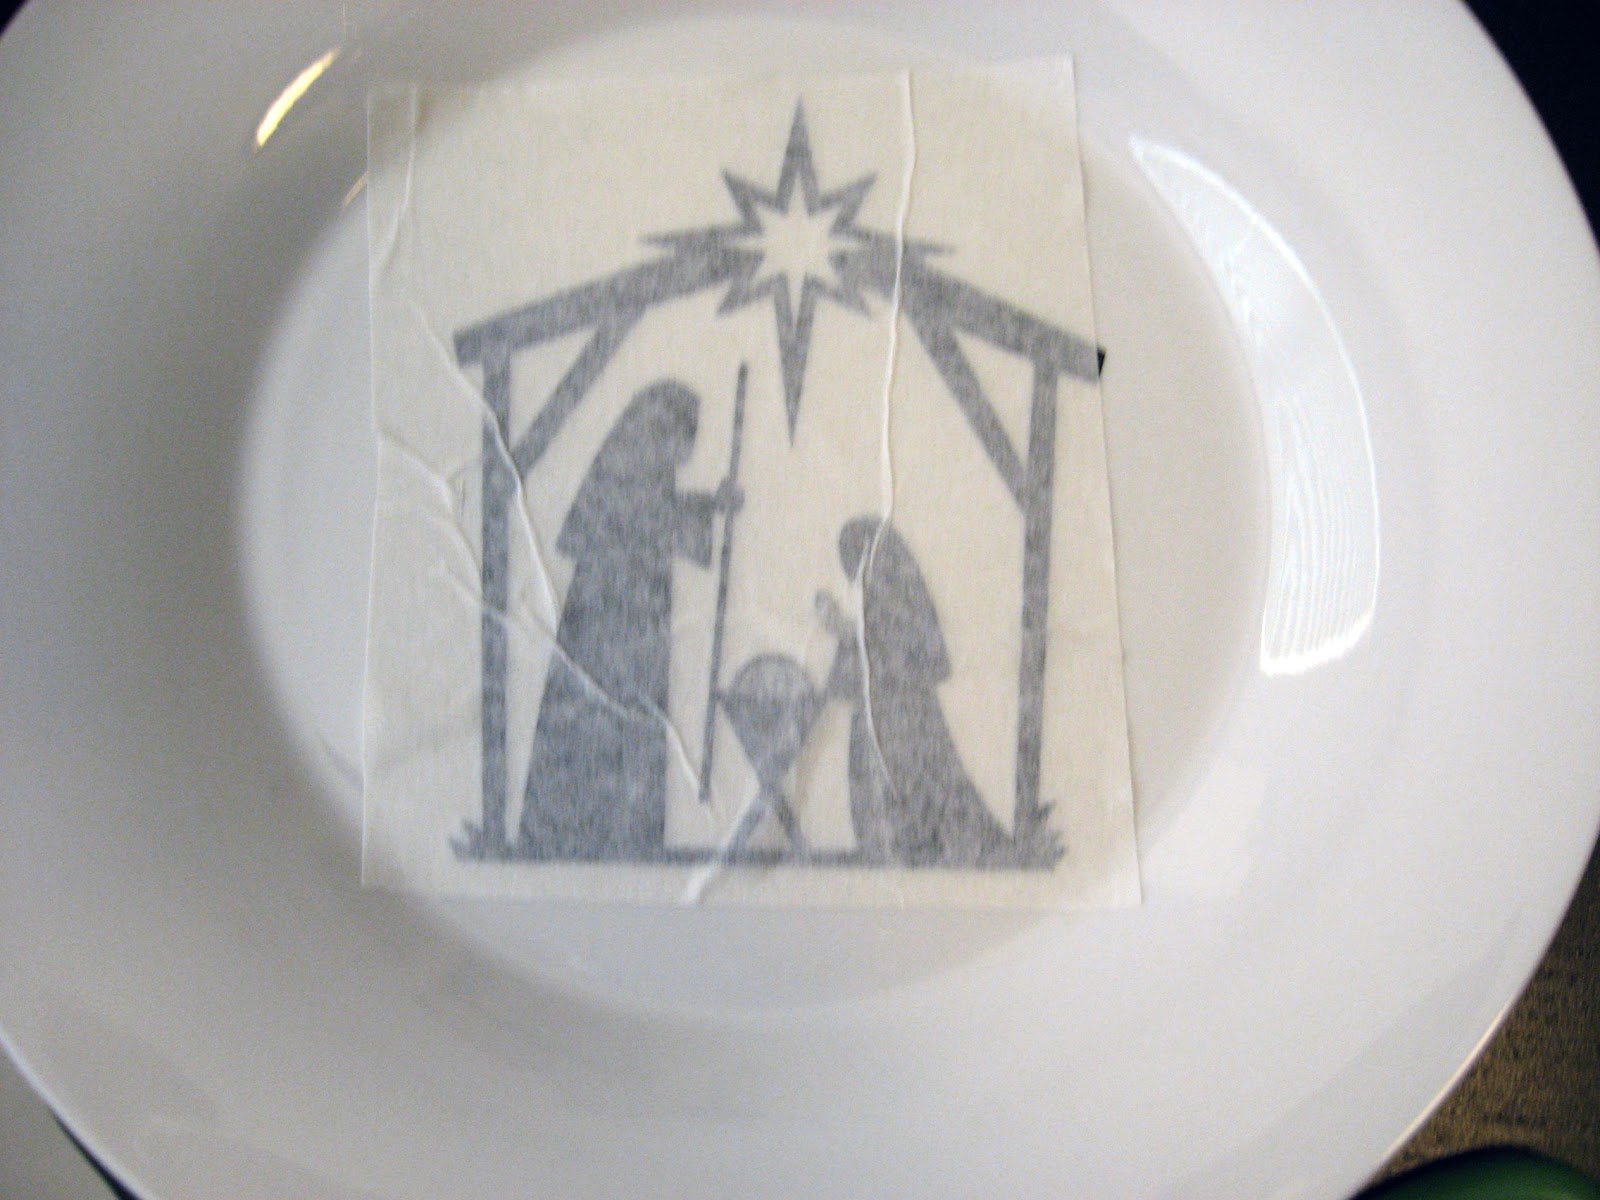
Next is a super fast and easy Nativity. It is not very expensive to make at all.

First you will need a plate. Whatever suits your style. You can usually find cheap ones in the clearance section of Ikea and Pier One or grab one at the Dollar Store.
That's where I typically head when I need them for projects.
Then I got out my trusty Silhouette. I found the design for the Nativity in their online store. It's the "One-piece Nativity." I cut it and weeded out the extra vinyl.


Then applied the transfer tape and placed it on the plate.

Voila! Fast and easy Nativity! This one is a gift for my mother-in-law who collects Nativities. I guarantee this is one she doesn't already have.

*If you don't have a Silhouette, you can still make this project. Look for a great sticker from Joann, Amazon or Etsy. They are all likely to have something you'd like. Apply some adhesive such as Zig 2-way glue to the back of the sticker and apply it to your plate. It should have a permanent bond and look just as beautiful!
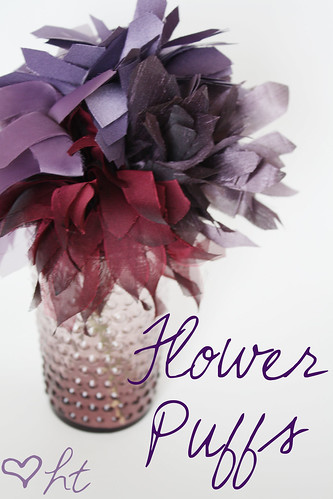
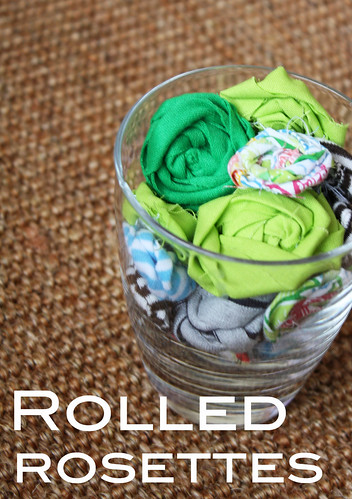
Wednesday, December 21, 2011

Favorite Flower Tutorials Round-up

If you've ever looked for help on making any sort of crafty flower, you may have noticed that there are a million tutorials out there. It may be overwhelming to try and sort through and find the exact type of flower that you are looking for. Well, worry no more! I've sorted through dozens of tutorials and have compiled some of the best right here for you.


Flower Puffs

Felt Dahlia Flower Brooch

How to Make Felt Flowers 

  Easy Layered Felt Flowers

That should satisfy all your flower needs! If there is a flower tutorial you are looking for that I forgot to include, let me know so I can add it to the list. 

Sunday, December 11, 2011

A Few of My Favorite Things...

With all the Christmas presents I've been working on lately, I thought I would share some of Santa's little helpers with you. These are some things that I just can't live without this year:

Source: Joann.com


For those that are familiar with rotary cutters, this is for use with the Olfa Deluxe 45mm Rotary Cutter. A rotary cutter is used with a self healing cutting mat and a ruler to cut fabric and it makes cutting a dream. The pinking blade makes cutting pinked edges (zig-zag) so much easier. I've used pinking shears on so many projects but I hate how uneven my lines come out! By using the rotary cutter, the cut lines on your fabric turn out so straight and even!

Source: Amazon.com

2. Singer Stylist Sewing Machine
I recently upgraded to this sewing machine from a more basic model and I am so impressed. If I had known there was such a difference, I would have done it much sooner. This machine has more stitch functions than I have figured out what do with. It also has an automatic threader, comes with an assortment of foot attachments and is incredibly easy to use. It would be great for a beginner or even a more experienced user. It is very reasonably priced too!


Source: www.silhouetteamerica.com
The newest model is the Silhouette Cameo, it has been on my wishlist since it was announced that they were going to be putting it out this fall. This amazing little machine can do everything! It cuts vinyl - both heat transfer and indoor/outdoor vinyl - scrapbook paper and cardstock, makes temporary tattoos, cuts fabric, it can sketch designs, all sorts of great things. I've used it to make gifts, cards, home decor, t-shirts and just about everything imaginable! I really don't know what I did before I had it.


Source: www.elmers.com
4. Elmer's CraftBond Glue Spots
These handy little glue spots are great for all my paper crafts. My most common use for them is when
making cards. They are also great for scrapbooking. But using these with my latest projects - a 3D snowflake and paper chain - turned out so much better than if I had used tape like the directions said (I'm not one to follow directions anyway!). They come in a variety of sizes and I've found them all to be useful depending on the project.


Source: http://www.beaconadhesives.com
5. Fabri-tac
This is such a fantastic adhesive. Most recently, I used it to decorate Christmas stockings. I found that it worked wonderfully to apply buttons, ribbon, pom-poms and felt flowers to my stockings. Then when my friend was talking about how plain her stockings were, the first thing that came to mind was using Fabri-tac to help with decorating hers. It's great because instead of having to figure out how to sew through layers upon layers of fabric, you use a bit of this and your materials adhere quickly and effortlessly. I think it's my new favorite way to "sew!"

 Disclaimer:  I was not paid for this post. I paid for all these products with my own money and these reviews are all my personal opinion. 

What are you all loving that we should know about???

Saturday, December 3, 2011

One for the guys (and girls too)...The Dresser Remodel

This project came to be because I have always loved Craftsman tool boxes but that's really not in the budget right now. And diamond plate! Oh how I love diamond plate! At one point I really wanted a kitchen with a diamond plate back splash. The inspiration for this project was this ratty old dresser that I used to store fabric in. I have much better storage for the fabric now, so I have no need for the dresser. On Pinterest, I had read some tutorials about repainting laminate without needing to sand (which I've heard can be a nightmare). This one from Karla's Cottage was especially helpful.

So I give you - The Dresser Remodel:


 1. I started with the ratty old dresser. Some of the laminate was peeling and it was just ugly. I prepped it by wiping it with a damp cloth and letting it dry. Then removed all the handles. The places where the laminate was hanging off, I carefully removed but didn't peel too far off.


2. The next step was to remove the drawers and paint two coats of Glidden Gripper Primer. The dry time for the coats is very short, only 30 minutes or an hour in between coats. It thoroughly covered everything. I only bought the quart size can of it and it was more than enough for the dresser and the drawers.


3. I used Benjamin Moore Color Samples in Red and Black. I had a coupon for two free cans, so that didn't end up costing anything. Two coats of black went on the drawers and two coats of red for the main piece. Then  sprayed a clear coat of Krylon on the entire thing. 


4. The finishing touch was new chrome handles and putting it back together. Total cost - less than $25 (some supplies I was able to get free and some I had on hand). Overall much cheaper than a new upright tool chest!

Thursday, December 1, 2011

Anthro-Inspired Necklace

Oh Anthropologie, how I love to look at EVERYTHING you make! But my budget would seriously be ruined if I bought some of the things you have. Like this. I love it! Like seriously LOVE it. I would ask anyone for it for Christmas but there are two problems - 1. No one in their right mind would spend $148 on it for me, 2. It's no longer in stock. So being the crafty person I am, I decided that I could make something that would satisfy my urge for this beauty.

My version is made of scraps of miscellaneous fabrics and ribbon from my overflowing scrap drawer, in a palette suitable to my wardrobe. For the clasp, I tied a knot in one end and made a loop out of the other so that it hooks together. The clasp looks similar to the Anthropologie necklace. I love the finished necklace! And the best part was it was completely free! I already had everything to make it.

Oh and you also get to see my new hair.The pink & blue is gone. I went in to get it cut and had a picture of the new style I wanted, which had a new color in it too. My stylist loved the color and convinced me to try it. It didn't take much convincing (I just had pink & blue, right). Her argument was, "If you don't like it, we'll change it again." Sounded great to me! Well, I love it! It just might last awhile.

Alphabet Soup

I had a birthday coming up for a very special one-year-old but I had no idea what to get for her. What do you get a one-year-old? I have other nieces and nephews, but it's been a bit since I've needed a gift for one that young. Off to bloggyland I went, in search of great gift ideas. It wasn't long before I came across a great project at Stitching in the Dark for a plush alphabet (updated 3/6/12: The page with the original tutorial is no longer available). Off to the sewing machine I went!

I had a charm pack (pre-cut squares) in great colors and matching flannel to use for the backing.

 I followed the guidelines in her tutorial and made my templates with Word, using font Tunga in size 400 in the outline mode.
Then I used a washable fabric marker to trace each of the letters onto a different pre-cut square.


So there should be your patterned fabric with the traced letters, batting cut to the same size and backing fabric cut to the same size.
Pin the pieces together in that order. Then carefully sew around your traced outlines with a straight stitch. I finished them by cutting the edges with pinking scissors so they won't fray.
 Then I stitched up this quick and easy drawstring tote from The Purl Bee to keep all the letters in.
 I received a sweet note that she loves it and that is the best part!

Wednesday, November 30, 2011

30 is creeping up!

I had a friend post a list of 30 things to do before turning 30 just the other day and I realized that I would be turning 30 much sooner that she would. Eight months from now actually! It's startling because it is so much sooner than I realized. It got me thinking that there are so many things that I would like to do (and need to do) between now and then. It seems to me that I'm much better at accomplishing these sorts of things when I write them down so I can see them. It took some serious thinking to come up with my list, but it's finally ready to share. Without further ado, here it is:


My 30 before 30: 
1.     Go wine tasting
2.     Lose (and never find again) at least 40 pounds
3.     Pay off a debt (or more)
4.     Host a party
5.     Finish taking my sewing class
6.     Try at least one new recipe a week
7.     Learn how to make tutorials for my blog
8.     Re-learn Spanish
9.     Go on a road trip
10.  Stay at a B&B
11.  Get a regular exercise schedule
12.  Run a 5k
13.  Finish our wedding scrapbook (or junk box as my husband calls it)
14.  Try scuba diving
15.  Go shooting with my husband more (actually learn how to use a shotgun and get better with a handgun)
16.  Read the Bible all the way through
17.  Learn to sew from a pattern
18.  Blog regularly
19.  Learn to decorate cupcakes/cakes
20.  Make the VIP fundraiser list at Ronald McDonald House Walk for Kids
21.  Organize my kitchen/pantry
22.  Organize my craft room (that’s a BIG project!!!)
23.  Get into good habits (reading scriptures, drinking more water, not putting my clothes at the foot of my bed, not leaving dishes in the sink, eating healthy… what I know I should already be doing)
24.  Learn to hand sew
25.  Learn how to design my blog
26.  Watch top 25 from American Film Institute’s 100 Best Movies (it’s a good start toward the “Whaaaatttttt, you haven’t seen [insert apparently AMAZING movie title here]?????” response that I always get when a movie is referenced)
 **Update (1/7/12)** - I've had a hard time finding the AFI movies because they are mostly older movies, so I've changed this to the top 25 from IMDb's Top 250 movies. 
27.  Go on a picnic (with our picnic basket that has never been used!)
28.  Volunteer for Project Linus more often
29.  Keep my coupons organized (instead of the crazy pile that they always seem to be in)
30.  Read one new book a month (and actually finish it)

I'll keep you all updated as the list gets checked off and post all the things I get to try/get done. Should make for a fun 8 months!

Update: Check out other 30 Before 30 lists here

Tuesday, November 15, 2011

Cupcakes for 2!

I love cupcakes but sometimes I don't want to go through the hassle and MESS of making a big ol' batch of them for just the two of us. Plus then I end up eating most of them. So you can imagine how excited I was when I found this tutorial at How Sweet It Is for making "Cupcakes for Two." My favorite part - it only uses ONE bowl.


We doubled the recipe and cooked them for about 20 minutes. We also added toffee pieces. They were so delicious, there wasn't any need to frost them. I may be making these a lot more often!